Create Elastic Beanstalk with Docker
Creating an Elastic Beanstalk Environment: 🏡
A Step-by-Step Guide 🪜
- Setting up your application on Amazon Elastic Beanstalk is a seamless process that allows for easy deployment and scaling. Follow these steps to create your environment:
Step 1: Open Elastic Beanstalk and Create Environment 📭

Step 2: Configure Environment 📊
-
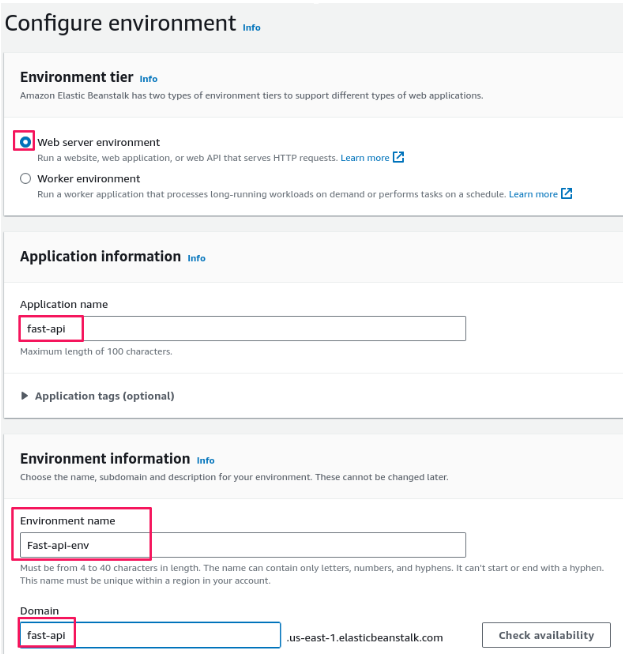
Open a new page and click on the web server.
-
Provide a suitable application name, let the environment name be selected automatically, and specify the domain name.
Step 3: Platform Configuration
-
Scroll down the page.
-
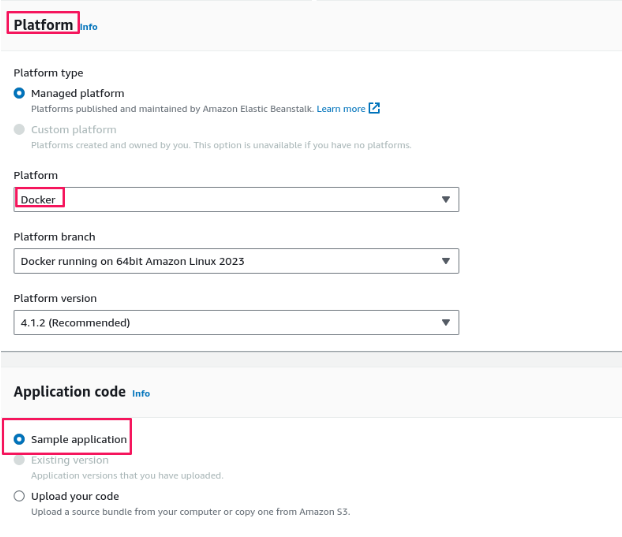
In the Platform section, select “Docker.”
-
Choose “Docker running on 64bit Amazon Linux 2023” as the platform branch.
-
For the application code, select “Sample application” and click Next.
Step 4: Configure Service Access
-
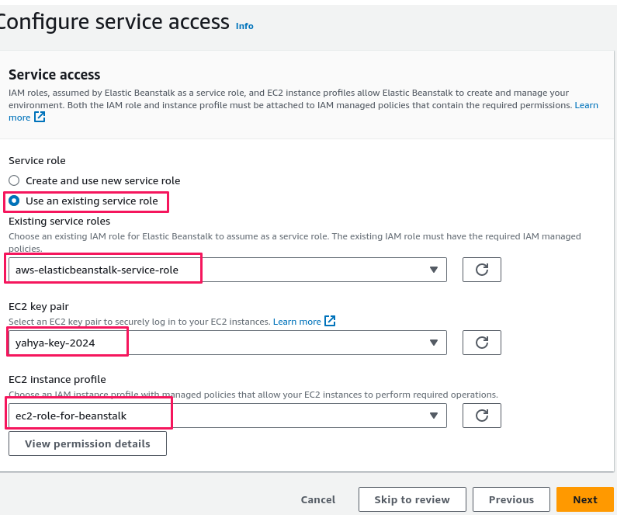
Configure the service access settings.
-
Select the appropriate options based on whether you are a first-time Elastic Beanstalk user or not.
-
Specify the EC2 key pair and choose the EC2 instance profile role.
Step 5: Networking Setup: 🖧
-
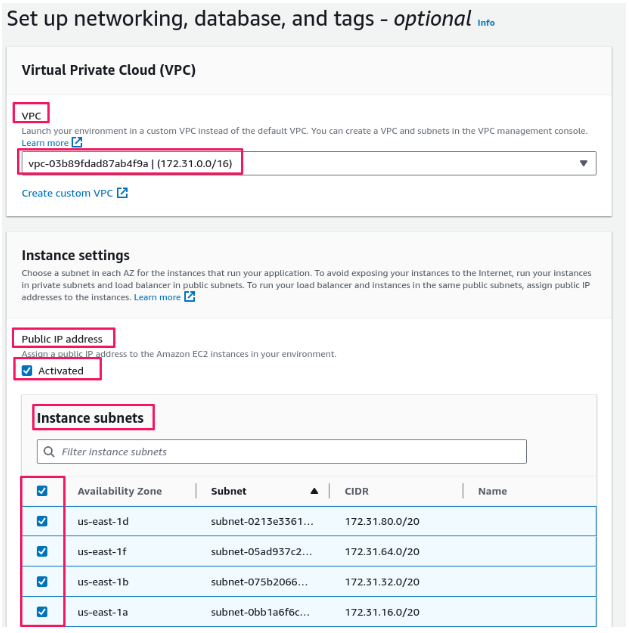
Select the VPC for networking.
-
Choose whether to give your EC2 instance a public IP.
-
Specify the required subnets for your EC2 instance.
Step 6: Database Configuration 🛢️
-
Scroll down the page.
-
Configure database settings if needed.
-
Enable database, select subnets, and fill in the required details.
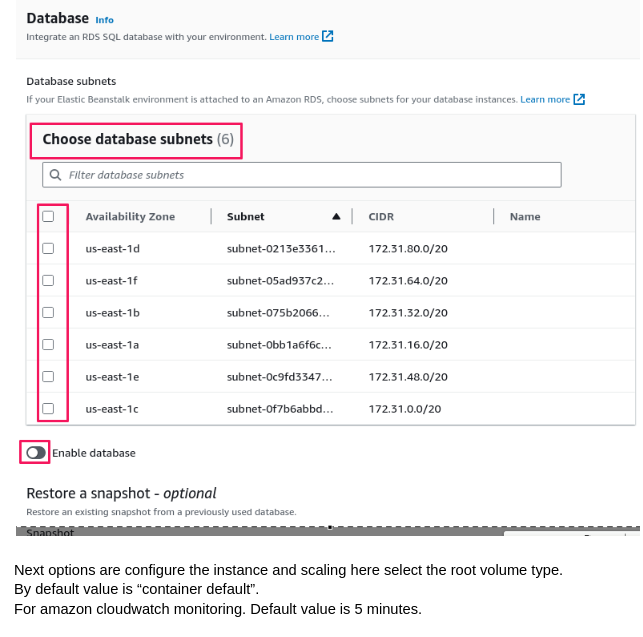
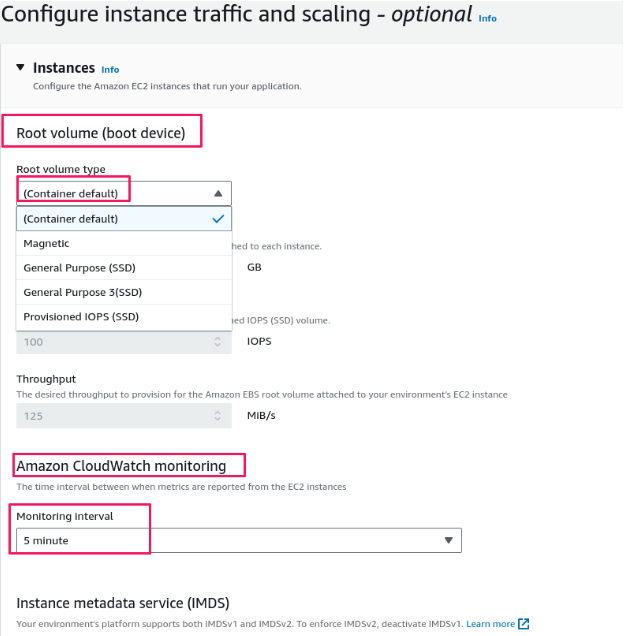
Step 7: Instance and Scaling Configuration 🖳
-
Configure instance settings.
-
Select the root volume type and Amazon CloudWatch monitoring interval
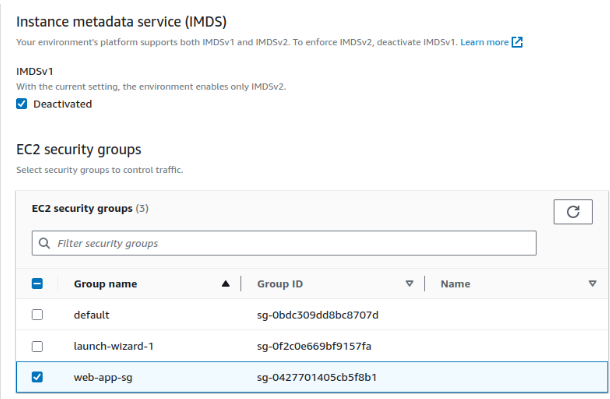
Step 8: Security Group Selection 🔏
- Select the security group for the environment.
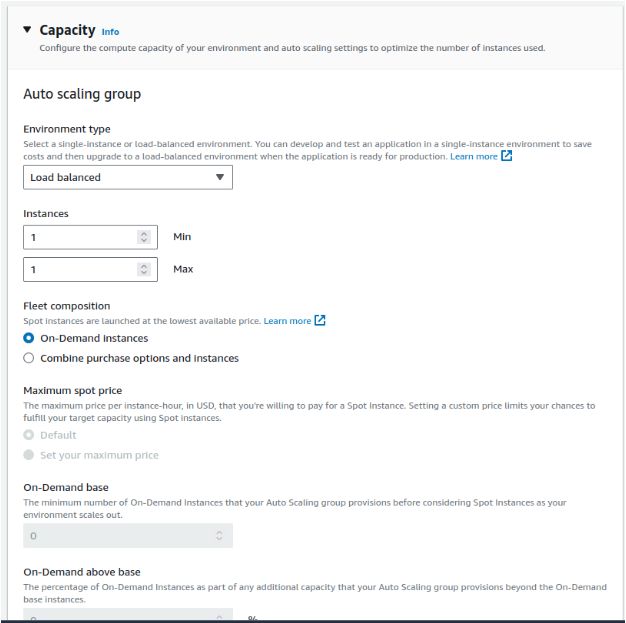
Step 9: ➕ ➖ Autoscaling 📑 Configuration 🖥️🖥🖥️🖥🖥️🖥🖥️🖥🖥️🖥🖥️
-
Configure autoscaling for the environment.
-
Choose “Loadbalanced” for the environment type and set minimum and maximum instances.
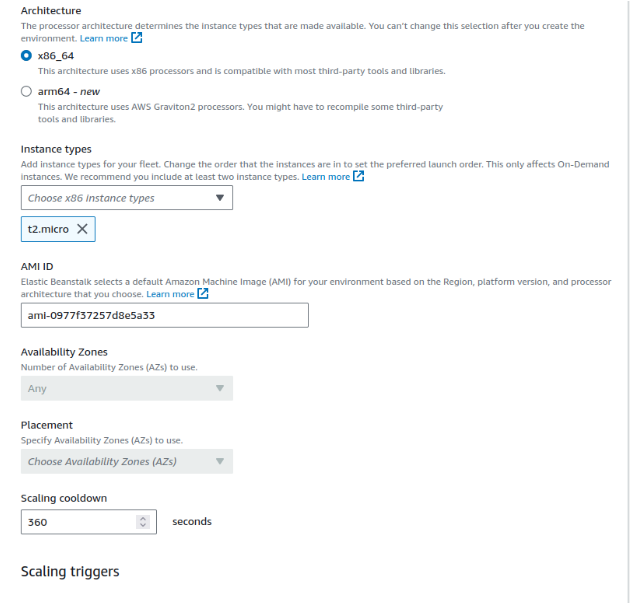
Step 10: 📐📏✏️Architecture and 🖥🖥️Instance Type: 🤔
-
Select the architecture (default: “s86_64”).
-
Choose the EC2 instance type.
-
AMI ID is selected automatically.
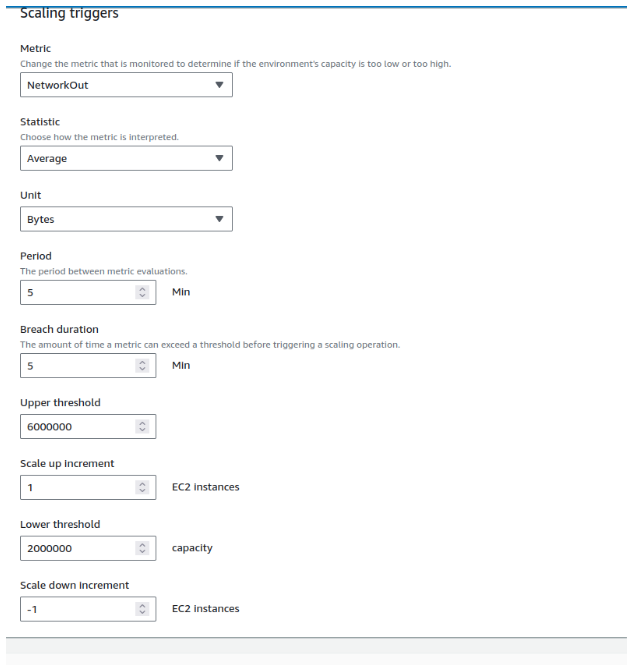
Step 11: Scaling Triggers 🎚️
- Use default scaling triggers settings.
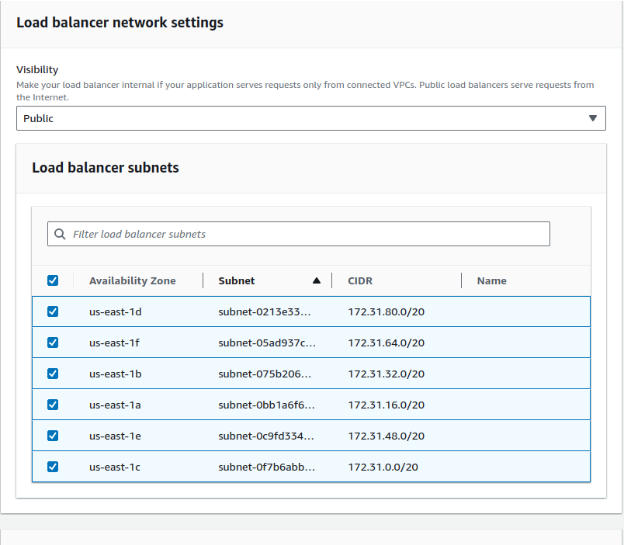
Step 12: Load Balancer Networking 🖧⚖
-
Configure load balancer settings.
-
Select visibility and subnets for the load balancer.
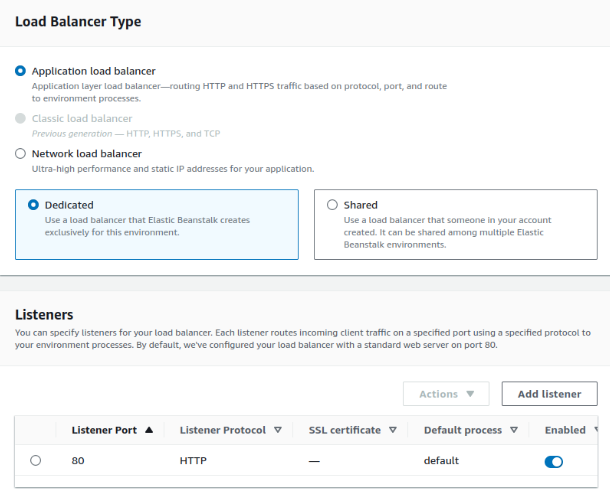
Step 13: Load Balancer Type and Listener 🎧
-
Select the load balancer type.
-
Add a listener if needed.
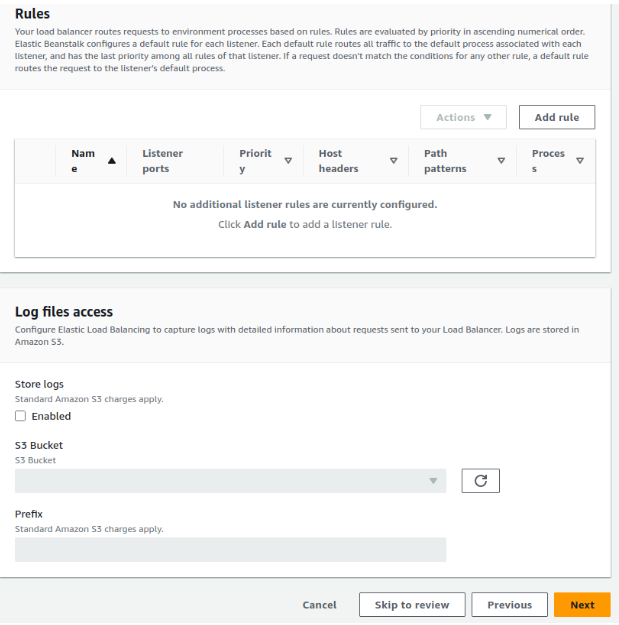
Step 14: Load Balancer Rules 📝
- Use default load balancer rules.
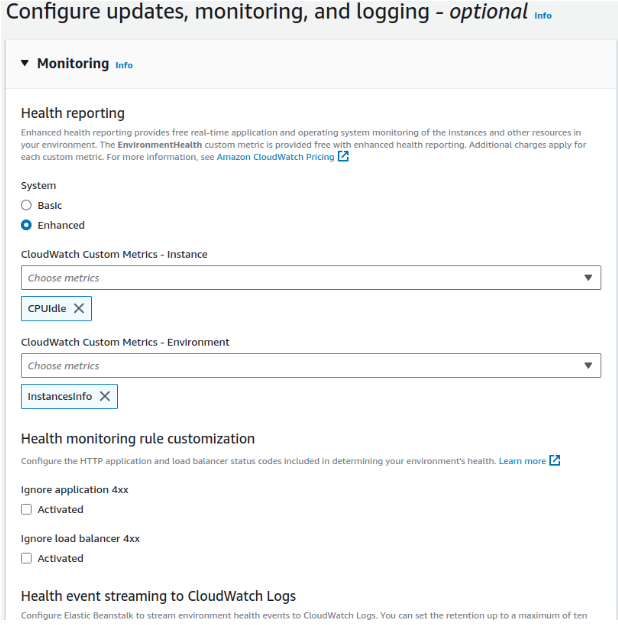
Step 15: Monitoring and Logging 📈
-
Open the next page.
-
Select monitoring and logging settings.
-
Choose “enhanced” for system settings and enable CloudWatch custom metrics for instances and the environment.
Step 16: Managed Updates and SNS Notification 📌📌
- Optionally, configure managed updates and SNS notification for platform updates.
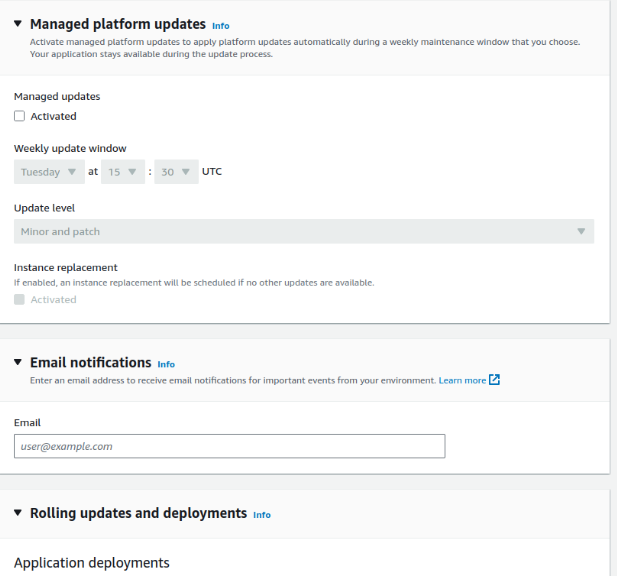
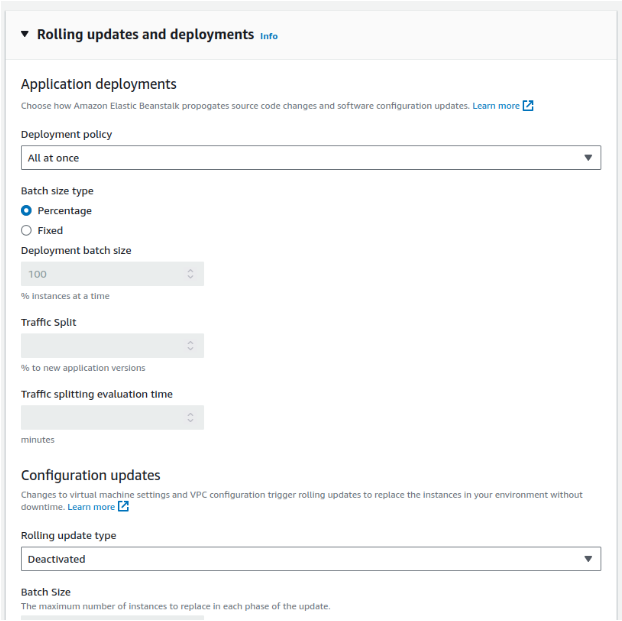
Step 17: Rolling Updates 📣
- Leave all next options as default.
Step 18: Platform Software 📀
-
Configure platform software settings.
-
Select the proxy server as “nginx” or none.
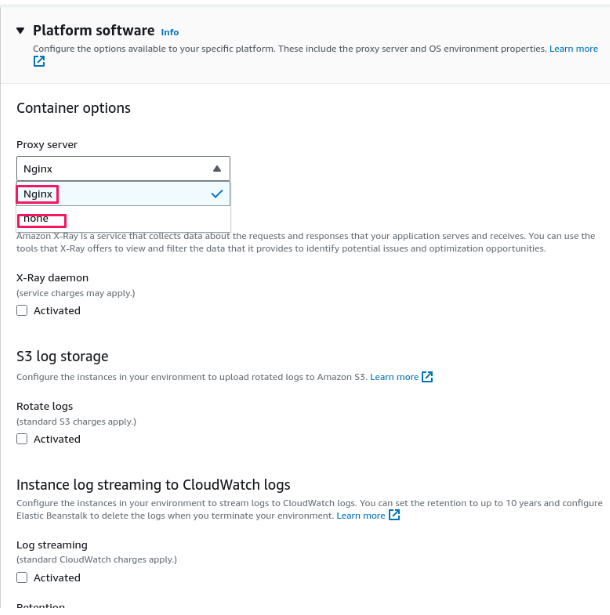
Step 19: Logs Storage on S3 📦 🧺
-
Configure S3 log storage settings if needed.
-
Provide credentials if required.

Step 20: Final Steps ⛳
-
Press next.
-
Review all details carefully and press submit.
-
After creating the environment, click on “Upload and Deploy,” choose the file “project.zip,” and upload the code.
-
After successfully deploying the code, your webpage should be working.